
A+ Tools adds an A+ Tools tab to the Revit ribbon with tools that turn a curtain wall into a finished drawing package — elevation, plan, dimensions, tags, schedules and a placed sheet — and keep your office's drawing standards in reusable settings profiles. This page takes you from downloading the installer to your first drawing: what you need, how to install, how to sign in (or start a free trial) and where everything is on the ribbon.
| You need | Autodesk Revit 2026 (update 2026.5 or later) or Revit 2027 on 64-bit Windows, an internet connection and a web browser |
| You get | The A+ Tools ribbon tab, ready-to-use default settings and a 14-day trial or a free account to start with |
| Time | About five minutes, including sign-in |
System requirements
| Requirement | Details |
|---|---|
| Revit | Autodesk Revit 2026, update 2026.5 or later, or any release of Revit 2027. Earlier Revit 2026 releases (2026.0–2026.4) cannot run A+ Tools — install the latest Revit update from Autodesk Access first. |
| Windows | 64-bit Windows that runs your Revit version. |
| Installing | Administrator rights on the computer (the installer installs for all users of the computer). |
| Internet | Needed to sign in, to start a trial and to check for updates. Free and trial accounts must be online every time they run a tool; paid licences can work offline for up to 7 days. See Licensing and credits. |
| Browser | Your default web browser is used for signing in and for the licence portal. |
Note — There is one installer per Revit year: A+ Tools for Revit 2026 and A+ Tools for Revit 2027. If you use both Revit versions, install both — see Side-by-side Revit versions.
Installing A+ Tools
Download the installer (an .msi file named like AedificonAPlus-2026.x.x.x.msi) for your Revit
year.
- Close Revit.
- Double-click the
.msifile. Windows asks for permission to make changes — the prompt shows A+ Tools for Autodesk Revit 2026 (or 2027) and Verified publisher: Aedificon AB. Click Yes. - On the Welcome page, click Next.
- Read the licence agreement, tick I accept the terms in the License Agreement and click Next.
- On the Installation options page, choose whether to start a trial and where to install (see Installation options below), then click Next.
- Click Install, wait for the progress bar, and click Finish on the Completed the Setup Wizard page.
- Start Revit. The A+ Tools tab appears in the ribbon.
 The Installation options page of the setup wizard.
Installation options
| Option | What it does | Default / tip |
|---|---|---|
| Get me started on a 14-day trial | Starts the anonymous 14-day trial automatically the first time you open Revit, so you can try the tools straight away without creating an account. If this computer has already had a trial or a licence, the trial cannot start and you see the normal sign-in window instead. | Unticked. Tick it if you just want to try A+ Tools. You can also start the trial later from the sign-in window. |
| Install at | The folder the plugin is installed in. The field is read-only — click Browse... to choose another folder. | C:\Program Files\Aedificon\A+ for Revit 2026\ (or …2027\). Keep the default unless your IT department says otherwise. |
What gets installed where
| What | Where |
|---|---|
| The plugin | The folder you chose (default C:\Program Files\Aedificon\A+ for Revit 2026\) |
| Revit's add-in registration | Revit's own add-ins folder for that Revit year |
| The sample repository with the default settings, and the template for your personal settings file | C:\ProgramData\Aedificon\A+ for Revit 2026\ |
| Your personal settings, licence information and log files (created when you first start Revit) | %LOCALAPPDATA%\Aedificon\A+ for Revit 2026\ |
Upgrading to a new version
When a new version is available, A+ Tools tells you when Revit starts, and you can check yourself from A+ Tools › Check for updates — see The A+ Tools menu. To upgrade:
- Close Revit.
- Run the new installer without uninstalling the old version first.
- After the licence agreement, the wizard shows Ready to upgrade with the folder A+ Tools is installed in. Click Upgrade.
The upgrade keeps your install location, your personal settings and your sign-in. The settings stored in your projects are kept too, and projects saved with the previous version open and run normally.
Note — You cannot install an older version over a newer one. Setup stops with a message asking you to uninstall the newer A+ Tools first.
Side-by-side Revit versions
Each Revit year has its own A+ Tools edition, with its own folders (A+ for Revit 2026,
A+ for Revit 2027) and its own personal settings. If you work in both Revit 2026 and Revit 2027,
install both editions — they do not interfere with each other. Your Aedificon account and licence
are the same in both.
For IT: silent installation
The installer supports unattended deployment, for example:
msiexec /i AedificonAPlus-<version>.msi /qn
msiexec /i AedificonAPlus-<version>.msi /qn APLUS_START_TRIAL=1 APLUSINSTALLFOLDER="D:\Apps\A+ for Revit 2026"
APLUS_START_TRIAL=1 is the same as ticking the trial checkbox; APLUSINSTALLFOLDER sets the
install folder. To pre-configure defaults for every new user on a computer (for example the
plugin language or the logging level), edit the installed template
C:\ProgramData\Aedificon\A+ for Revit 2026\Settings.xml — it is copied to each user's personal
settings the first time they start Revit with A+ Tools.
The first time you start Revit
When Revit has finished starting, A+ Tools checks your licence in the background and then does one of two things:
- You ticked the trial checkbox in the installer — the 14-day trial starts automatically and no window appears. The tools are ready to use. A+ Tools › About A+ shows Plan: Trial.
- Otherwise — the A+ Tools Licence window opens and asks you to sign in.
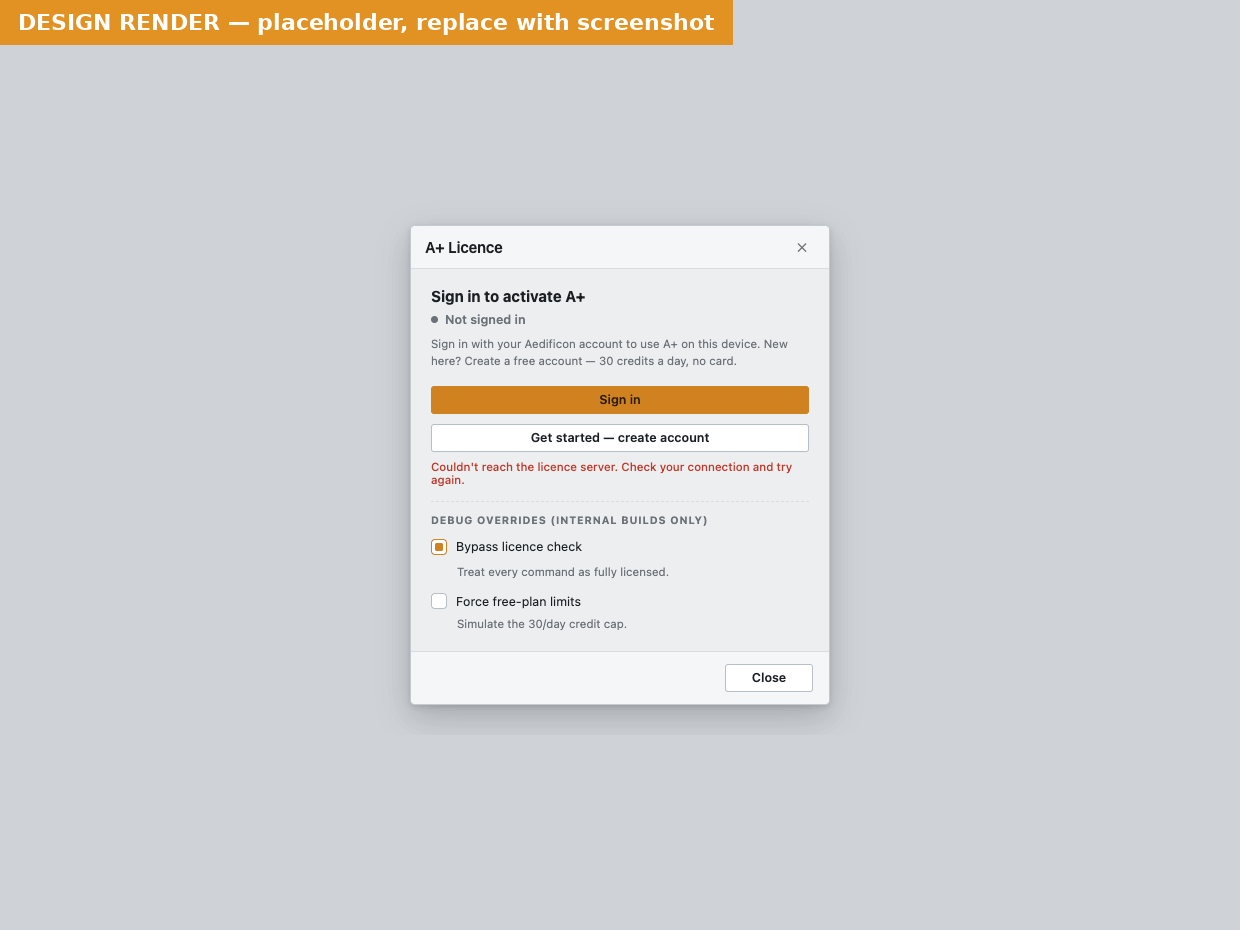 The A+ Tools Licence window.
| Choice | What happens |
|---|---|
| Sign in | Opens your browser to sign in with your existing Aedificon account. |
| Create account | Opens your browser on the sign-up page. A free account gives you 30 credits per day and 100 per month, with no credit card required. |
| Just get me started on a 14-day trial | Starts the trial immediately — no account, no browser. Only shown on computers that have never had a trial or a licence. |
| Close | Closes the window without signing in. The drawing tools stay greyed out until you sign in or start a trial — use A+ Tools › Sign in when you are ready. |
The trial and the Free account are explained in Licensing and credits.
Signing in through your browser
- Click Sign in (or Create account). A new browser window opens on the Aedificon sign-in page.
- Sign in, or fill in the sign-up form. The first time, you may be asked to allow the A+ Plugin to access your account — accept.
- The browser shows You're signed in — You can close this window and return to Revit.
- Back in Revit, the A+ Tools Licence window closes by itself and the tools are ready. Your name now appears in the A+ Tools menu.
You stay signed in on this computer, also after restarting Revit, until you choose A+ Tools › Log out.
Tip — The A+ Tools Licence window stays usable while the browser is open. If you closed the browser by mistake, simply click Sign in again; A+ Tools waits up to five minutes for the browser sign-in to finish.
If the browser shows Sign-in didn't complete, go back to Revit — the A+ Tools Licence window shows the reason in red under the buttons.
Verifying your email address (new accounts)
A new account must confirm its email address before it can be used:
- After you create the account, the A+ Tools Licence window changes to Please verify your email address — We sent a verification link to your inbox. Click it, return to A+, and then click Sign in below.
- Open the email from Aedificon and click the verification link.
- Return to Revit and click Sign in in the same window. This time the sign-in completes (usually without asking for your password again).
Tip — No email? Check your spam folder, and make sure you signed up with the address you are checking.
A tour of the A+ Tools ribbon tab
 The A+ Tools tab in the Revit ribbon.
| Panel | Button | What it does |
|---|---|---|
| Aedificon | A+ Tools (menu) | Licence portal, Plugin settings, Help, Support, About A+, Check for updates, your account and Sign in / Log out. See The A+ Tools menu. |
| Curtain Wall | Create Drawing | Creates a complete drawing package for a curtain wall: elevation and plan views, panel division, dimensions, tags, schedules, sheet placement and naming. See Create Drawing. |
| Curtain Wall Utilities | Create Panel Divisions | Re-divides the glass panels of a curtain wall to a standard width or a repeating pattern. See Create Panel Divisions. |
| Redimension Elevation | Re-creates the dimensions on an existing curtain wall elevation or section. See Redimension Elevation. | |
| Settings | Transfer Settings | Copies Revit standards between your project and a repository. See Transfer Settings. |
| Settings Manager | All tool settings in one window. See Settings Manager. |
A few things worth knowing about the buttons:
- Greyed-out buttons — the drawing tools are greyed out until you are signed in or on a trial. They are also greyed out in views where they cannot work: Create Drawing and Create Panel Divisions need a view where you can pick a wall (plan, elevation, section, detail or 3D view), and Redimension Elevation needs an elevation or section view to be active.
- Buttons that turn into menus — when you tick Add as menu item to ribbon on a settings profile, that tool's button becomes a drop-down with one item per profile, so you can run the tool with a specific profile in one click. See Settings profiles and repositories.
The default settings that ship
You do not have to set anything up before your first drawing:
- Ready-made settings profiles. The installer puts a sample repository on your computer — a small Revit template holding default settings profiles for the tools and the view templates, types and styles those profiles use. The first time a tool needs settings in a project, A+ Tools copies them into the project (you may briefly see Loading default settings...). This appears as one step, Load A+ Standards, in Revit's undo list.
- Settings live in the project. From then on the settings are stored in the project itself, so everyone working on the project uses the same ones. Change them in the Settings Manager or from a tool's settings button.
- Your personal preferences — plugin language (follows Revit), logging level (Normal) and the repository paths — are in A+ Tools › Plugin settings. See The A+ Tools menu.
Tip — Your office can keep its own standards in a central repository so that every project starts from the office defaults instead of the factory ones. See Settings profiles and repositories.
Your first drawing in five steps
- Open a project with a curtain wall and go to a floor plan where the wall is visible.
- Click A+ Tools tab › Curtain Wall panel › Create Drawing. (If some settings do not match this project — for example a view template it does not have — the settings window opens first; correct the settings and click OK.)
- Click the curtain wall.
- Click a point on the side of the wall you want to look at it from — the observation point. A+ Tools now creates the elevation, plan, dimensions, schedules and sheet.
- Press Esc and click Yes - Commit changes and finish. Open the new sheet in the Project Browser.
The whole package is one undo step, so if you want to try different settings, undo, adjust and run again. All the details are in Create Drawing.
Note — On a Free account or a trial, each drawing package costs credits. Credits are only charged once a drawing has actually been created — cancelling before that costs nothing. See Licensing and credits.
Uninstalling
- Close Revit.
- Open Windows Settings › Apps › Installed apps (or Control Panel › Programs and Features).
- Find A+ Tools for Revit 2026 (or 2027) and choose Uninstall.
Uninstalling removes the plugin, Revit's add-in registration and the sample repository. It does not remove:
- the settings stored in your projects,
- your personal settings and log files in
%LOCALAPPDATA%\Aedificon\A+ for Revit 2026\— delete the folder by hand if you want a completely clean start, - this computer's registration on your licence.
Important — If you are leaving this computer for good, first choose A+ Tools › Log out, and then free the computer's place on your licence in the licence portal (Devices). Otherwise the computer keeps using one of your licence's device places. See Moving to another computer.
Where to get help
- This help — every tool page has a Messages you might see table, and Messages and troubleshooting lists every message.
- Support — A+ Tools › Support opens the Aedificon support page (www.aedificon.ai/support).
- Your licence and account — A+ Tools › Licence portal. See The licence portal.
- Log files — when you contact support, attach the log from A+ Tools › Plugin settings › Log folder › Open.
Tips
Tip — Not sure whether you are signed in? Open the A+ Tools menu: your name is shown above Log out. A dash (-) with Sign in below it means you are signed out.
Tip — Trying A+ Tools on a shared or test computer? Use the 14-day trial — it needs no account and does not use up your Free account's single computer place.
Tip — Work in Revit in another language? A+ Tools follows Revit's language automatically (13 languages). To use a different one, change Plugin language in Plugin settings and restart Revit.
Tip — Corporate network? Sign-in uses a short-lived connection on your own computer (ports 53217–53221 on
localhost) to receive the answer from the browser. If sign-in always fails with a message about ports, ask IT to allow these local ports.
Messages you might see
| Message | What it means | What to do |
|---|---|---|
| Autodesk Revit 2026 was not found on this computer. (installer) | The installer could not find Revit for this edition's year. | Install Revit first, or download the A+ Tools edition for the Revit year you have. |
| Your Autodesk Revit 2026 installation is older than 2026.5. (installer) | Your Revit 2026 is too old for A+ Tools. | Install the latest Revit 2026 update from Autodesk Access or manage.autodesk.com, then run setup again. |
| A newer version of A+ Tools for Autodesk Revit 2026 is already installed on this computer. (installer) | You ran an older installer over a newer version. | Keep the newer version, or uninstall it first if you really need the older one. |
| Please verify your email address | Your new account's email address is not confirmed yet. | Click the link in the verification email, then click Sign in again. |
| Sign-in did not complete. Please try again. | The browser sign-in was cancelled or did not finish. | Click Sign in again. |
| Sign-in failed: … | The sign-in service refused the sign-in; the reason follows. | Read the reason; try again or contact support. |
| All A+ Tools OAuth callback ports are in use. | Another program is using the local ports sign-in needs. | Close other programs, or ask IT about ports 53217–53221, and try again. |
| A trial has already been used on this computer or Autodesk account. | The 14-day trial is once per computer and per Autodesk account. | Sign in, or create a free account. |
| This computer is already set up with an A+ licence. Sign in to continue. | The computer has been used with an account before, so it cannot start a trial. | Sign in with your account. |
| Could not reach Aedificon to start your trial. | No connection to the licensing service. | Check your internet connection and try again. |
All licence messages are explained in Licensing and credits; everything else in Messages and troubleshooting.
Related pages
- The A+ Tools menu
- Licensing and credits
- The licence portal
- Create Drawing
- Settings profiles and repositories
- Messages and troubleshooting
Last updated 2026-10-02.